Creating Cottonstar: A Process of Drawing a Webcomic Page
By Staff Writer 15 March 2016 | Categories: feature articles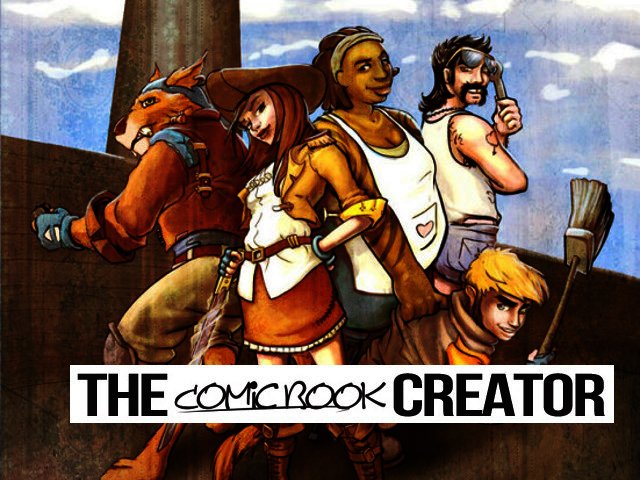
Related Articles

For all those interested in starting a webcomic, artist Ben Geldenhuys takes us through the creative process behind Cottonstar.
This article is published under permission from Indie Comics SA on which it first appeared.
Welcome, fellow creator.
Let’s assume that you’re planning on creating a webcomic, to which I would say: “Please reconsider that decision. CHOOSE LIFE!” But if you’re stubborn enough to disregard my warning, you can look forward to going through a similar process as mine for the rest of your life (or at least until you manage to finish your pet project).
Please note that this isn’t THE ONLY WAY to create a webcomic, but it is how I draw my comic every single week. This is also not entirely educational, but I hope I can share some insights by showing you my way of creating a Cottonstar page.
Firstly, a bit of history (I’ll keep it brief, I promise!)
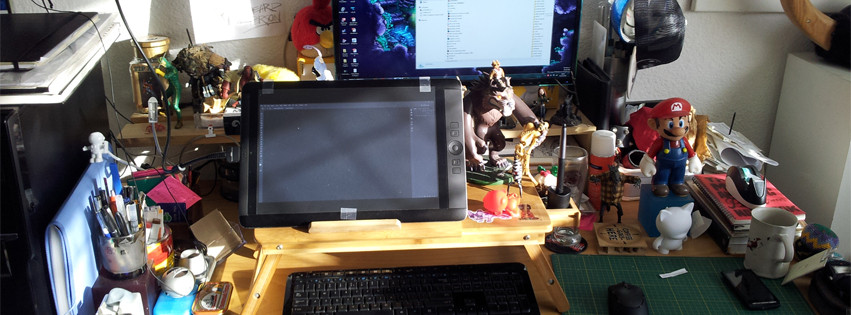
In the early days of Cottonstar I used to do things the traditional way, meaning about 80% of the page was drawn in traditional media and the remaining 20% was coloured and lettered digitally.

As amazing as traditional media is, it became a bit too impractical in the end and it took us far too long to produce pages for a weekly update schedule. Making edits was a tough challenge as well.
We needed to streamline this process, so a decision was made to go full digital.
What I’m ultimately getting at is that finding the medium that you’re most content with really helps you in the long run. So whether you decide to go the traditional or digital route is purely up to what’s most comfortable for you.
And now, this is the way we’re content with doing Cottonstar:
Step 1 - Script & Thumbnails aka Building Blocks for Page Layout
Scripting a page beforehand is essential for us to create a page. Not only is it because there’s a narrative to drive but it also helps me to plan the layout of the page and where I intend to place speech bubbles. We’ve actually dedicated an entire book to do JUST that.
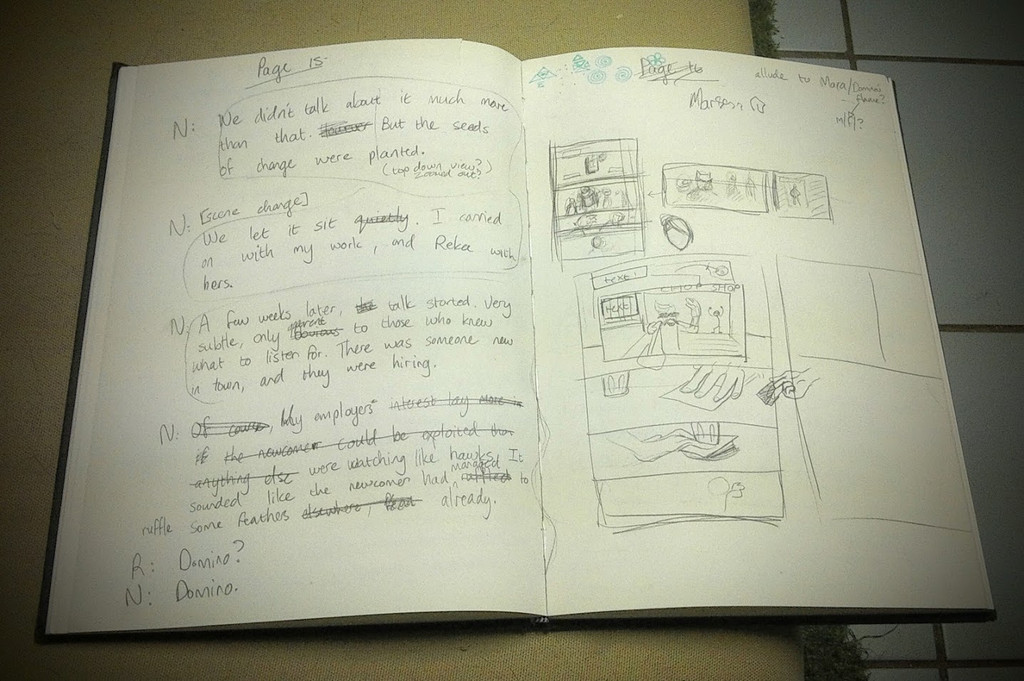
Danelle (co-creator of Cottonstar) writes up the script and then we both sit and discuss it, draw VERY rough thumbnails (aka scamps) to check if the pacing works, divide it up in panels, etc.
This is our messy blueprint for:
Step 2 - Roughs
Known in the mainstream comics industry as the pencils stage, this is where the actual magic happens. Where words become pictures. Personally I’ve never really been much of a pencil artist, so I’ve always really treated mine more like a prototype (hence why I refer to it as a rough). Before I do any drawing though, I drag in some panels:
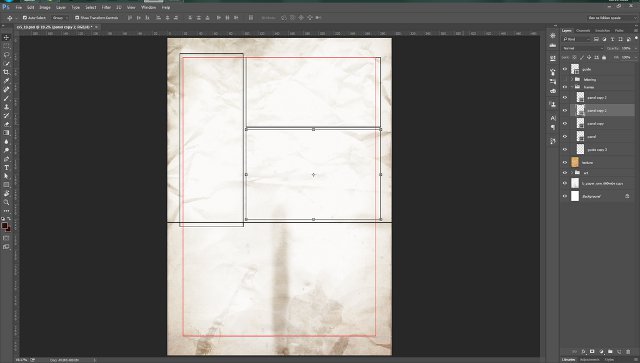
Now you’ll notice I have a red block in there which is called the Guide layer. That is my title safe area, speech bubbles shouldn’t exceed past it. It is primarily for making sure no text gets cropped off when we go to print. Again, this is what works for us so it isn’t a necessity but it certainly allows me to sleep better at night.
Now I can draw inside the panels:
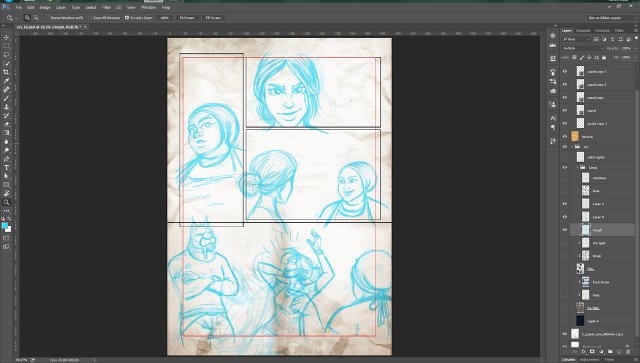
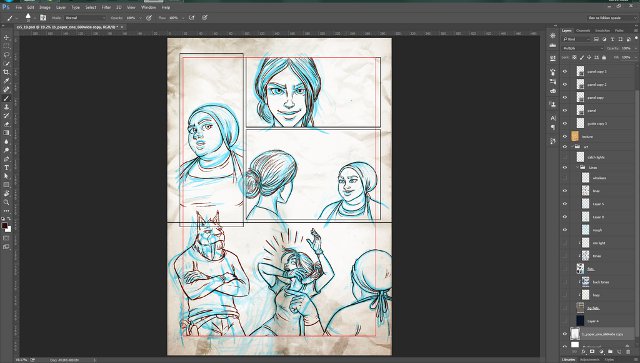
I draw in a sort of Cyan colour because it helps me distinguish inked/final lines from my roughs. It is also the kind of thing left over from when I used to draw pages traditionally using blue pencil that I would later colour-key to get rid of the rough lines.
This process takes a fair bit of time usually because of changing some angles or compositions within the panels to make the visual narrative appeal more interesting. In most cases the final result would be quite different from the original thumbnails.
This also needs to be somewhat finalised and tidy enough for:
Step 3 - Final Lines aka Inks
This is where the tidy work starts. This step is fairly straightforward, basically by drawing over my roughs on a new layer with tight and clean linework. Usually with the characters separate from the background linework (however in the example shown, this wasn’t necessary).
Colour-wise, I don’t work with straight black like I used to do before, but rather with a dark reddish-brown. To me personally it makes everything look more organic, as has been the intended overall aesthetic with Cottonstar.
Once that’s all done and properly revised, it is time to move onto the step I find the most tedious of all:
Step 4 - Flat Colours
Now some folks like to colour stuff in, I’m not one of those people. Especially since it is just flat colours without any tonal values in place yet (that’s reserved for the next step). Danelle usually assists here as she’s much better and faster at it than I am, but I’ve had to take over the duties for this page due to her carpal tunnel syndrome giving her trouble.
In this particular scene, it takes place at night in a slightly dimly lit room, so the colours are fairly muted and slightly cooler than they would be during daytime.
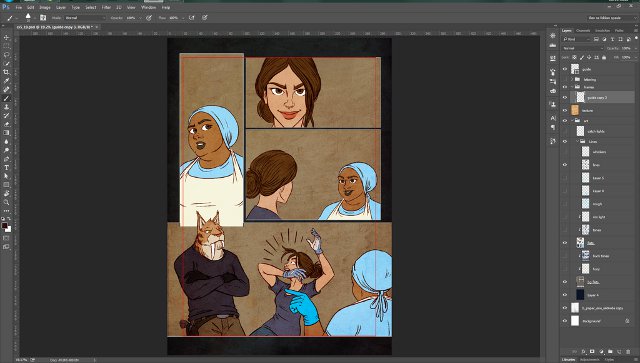
A nice little device to utilise for dark or night-time scenes, is using a darker canvas and gutter area to get the point across.
Once that’s all over, we can move on to:
Step 5 - Tonal Values & Highlights
This has to be one of my favourite steps. On a separate layer, with the blending mode set to Multiply, it is time to do some shading!
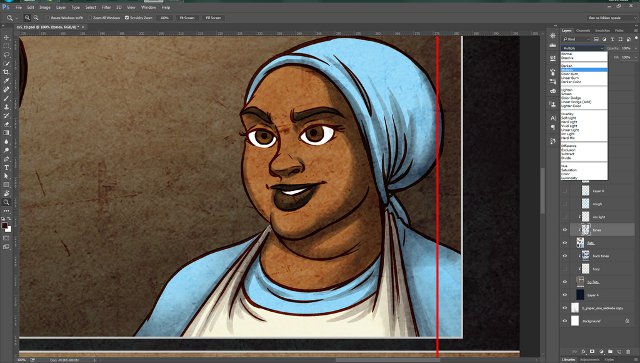
In this instance, I used a cooler shade, because of the type of lighting in the scene. I also used the exact same brush I use for my lines, only now it is set to Transfer. It should look like this once everything has been toned:
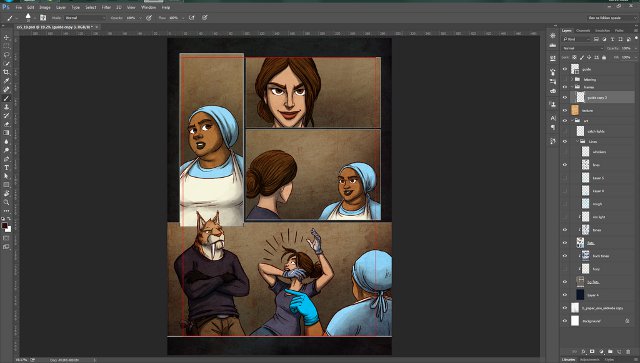
Then, I start adding highlights, ambient occlusion and catch-lights in the eyes to make everything come to life.
You’ll notice that I had to invert the colour of my panel borders to prevent them from blending into the canvas colour. Again, this is just how I prefer it.
Once all of this is in order, it is time to proceed to:
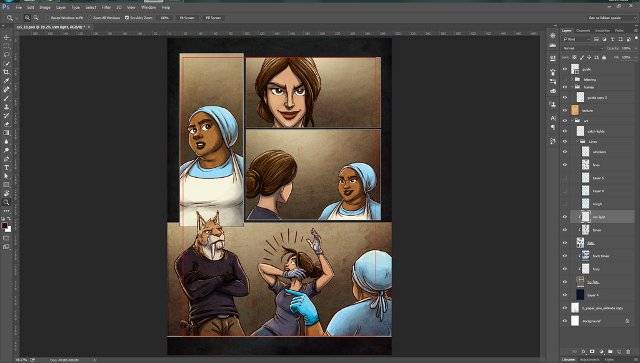
Step 6 - Lettering
The last and ultimately vital step is to add the written narrative to accompany the visual. Lettering can be a bit tricky if you are new to it and quite a different beast to pencilling and inking. This can either make or break the quality of your comic, and it is often dismissed as something that just needs to be there. I’ve seen some really well-drawn comics get dragged down by poor lettering.
Lettering is important! I can’t stress it enough, and it doesn’t need to be over-the-top to work effectively. In fact, the simpler the better. Just get a decent font, avoid the stock Photoshop word balloons, and most importantly: make sure it fits well with the artwork. It takes a bit of practice, just like everything else.
For a start, I can highly recommend comic fonts from www.blambot.com as they are specifically designed for comics by an AMAZING typesetter who actually works in the mainstream comics industry. So now YOU DON’T HAVE AN EXCUSE TO USE COMIC SANS!!
Now that I’ve addressed the elephant in the room, let’s continue.
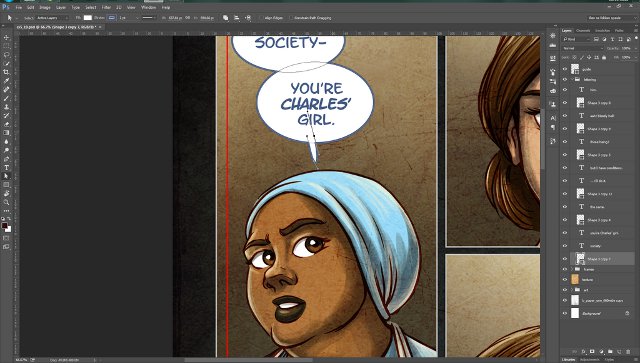
I pretty much use the Ellipse tool and Pen tool primarily to build my word balloons. Sticking to the organic aesthetic, all of my speech tails are rounded. It just fits better with the artwork. And you’ll notice off-hand that all the text and outer strokes of the speech bubbles are in a kind of teal shade. Again, that’s the look and feel we want for our own comic.
A hint on lettering: Since we write in English, everything reads from left to right, top to bottom. The same thing applies to the placement of speech bubbles in every panel, ones that are top left are spoken first, and anything below or to the right follows.
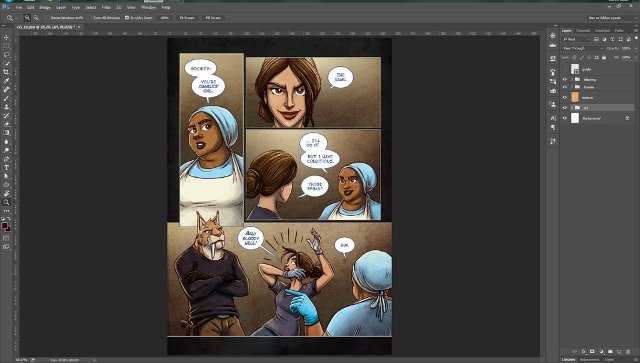
Ultimately, this is what a fully lettered and final page of Cottonstar looks like (note the title safe area!):
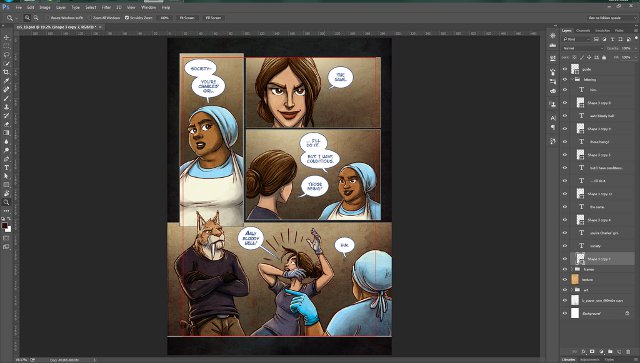
And now it is pretty much ready to upload to the site!
Conclusion
And that, fellow creator, is how we do things the Cottonstar way. All-in-all it takes about six days to complete a single page of Cottonstar, and by that I mean working in the evenings primarily, in between other freelance projects and contract jobs. Everyone works at their own pace though. There are people who are able to push out beautifully rendered pages at a rate of five per week. We are not those people. So take it at a pace which is comfortable and works for you.
Nothing good can come of burning yourself out over a love project. There will be a noticeable dip in the quality of your output (as well as your personal well-being), and you don’t want that.
If you have read this far it means that you have either:
A) wasted a few minutes of your life or
B) hopefully have learnt something new and/or
C) are stubborn enough to take on the insane task of creating a webcomic
In all seriousness, I hope you enjoyed reading about this process on the creation of a Cottonstar page.
Happy Drawing!
Ben Geldenhuys
You can see more from Ben Geldenhuys here:
Also check out Cottonstar co-creator, Danelle Malan's work:
Looking to buy? Check out Cottonstar and more awesome local independent comics over at Indie Comics SA.
Most Read Articles

Have Your Say
What new tech or developments are you most anticipating this year?